Procedure
Configuring Server 2012 for IIS and IDVM
- Make sure that the Pre-Requisites are installed before starting the configurations in Programs and features
- How to Enable .Net Framework 3.5 on Microsoft Windows Server 2012
- If the server is connected to the internet and it has Windows update enabled, the framework can be pulled from the internet and added to the Windows installation folder by the OS when enabling the feature.
- On Server 2012 R2 this is a non-issue as it is already installed
- On Server 2012 R2 this is a non-issue as it is already installed
- If the server is connected to the internet and it has Windows update enabled, the framework can be pulled from the internet and added to the Windows installation folder by the OS when enabling the feature.
- Go to Programs and Features – this will take you to the Roles and Features wizard for Server 2012
- Enable Web Server (IIS) in Server Roles and the following features inside of it
- Common HTTP Features
- Default Document
- Directory Browsing
- HTTP Errors
- Static Content
- HTTP Redirection
- Common HTTP Features
- Health and Diagnostics
- HTTP Logging
- Performance
- Static Content Compression
- Enable Web Server (IIS) in Server Roles and the following features inside of it
- Security
- Request Filtering
- Windows Authentication
- Application and Development
- .NET Extensibility 3.5
- .NET Extensibility 4.5
- ASP .NET 3.5
- ASP .NET 4.5
- ISAPI Extensions
- ISAPI Filters
- Management Tools
- IIS Management Console
- IIS 6 Management Compatibility
- IIS 6 Metabase Compatibility
- IIS 6 WMI Compatibility
- IIS Management Scripts and Tools
- Management Service
- Continue to Features and ensure the following is Enabled:
- .NET Framework 3.5 Features
- HTTP Activation
- .NET Framework 3.5 Features
- .NET Framework 4.5 Features
- .NET Framework 4.5
- ASP.NET 4.5
- WCF Services
- HTTP Activation
- HTTP Activation
- Install the LS Application Server
- If OnGuard is already installed click Modify from the installer after opening Setup.exe on the installation media, expand out Server Applications and select the Application Server to be installed on the local disc.
NOTE: DO NOT UNCHECK ANY OF THE OTHER OPTIONS, DOING SO WILL UNINSTALL ONGUARD - If OnGuard is not yet installed, the Platform installation option will install OnGuard and the LS Application Server Service
- If OnGuard is already installed click Modify from the installer after opening Setup.exe on the installation media, expand out Server Applications and select the Application Server to be installed on the local disc.
- Run FormsTranslator (Lnl.Tools.FormTranslator.exe) from the root of OnGuard
- Note: If Platform install was done in the above step this can be skipped as FormsTranslator runs automatically at the end of Database Setup
- Note: If Platform install was done in the above step this can be skipped as FormsTranslator runs automatically at the end of Database Setup
- Create an admin account for the LS Application Server
- If the system is on a domain then use a domain user who is also a Local Admin
NOTE: if you plan to use IDVM Host Application you must have a Domain and the account use must belong to the Domain.
- To make the domain account a local admin:
- Right click on My Computer > Select Manage > Expand out Local Users and Groups
- Left mouse click on Groups (under Local Users and Groups) > Right click on the Administrators Name > select properties
- Click [Add...]
- Click [Locations...] > select the domain as the location
- Click [Advanced...]
- Click [Find Now]
- Select the domain user from the list
- Click [OK]
- The 'Enter the object name to select' field should be populated now with domain\domain user > Click [OK]
- Start the Application Server using the specific user account you created previously
- Go to Start > Run > type services.msc
- Right click on LS Application Server service > select properties
- Select the Log On tab > the radio button for 'This account:'
- Click [Browse...]
- Click [Locations...] > select the local machine or domain as the location
- Click [Advanced...]
- Click [Find Now]
- Select LSApplication or domain user from the list
- Click [OK]
- The 'Enter the object name to select' field should be populated now with localMachineName\LSApplication or domain\domain user
- Click [OK]
- Type the password for the LSApplication user 2 times (Password and Confirm Password fields)
- Click [OK]
- Click [OK]
- Add the SQL Login for the new user of the LS Application Server
- Open SQL Management Studio Express > login with Windows Authentication or as SA if using SQL Authentication
- Expand Security in the Object Explorer
- Right click on Logins > New Login...
- [Search...] located next the text field for Login name:
- Click [Locations...] > select the local machine or domain as the location
- Click [Advanced...]
- Click [Find Now]
- Select LSApplication or domain user from the list
- Click [OK]
- [Search...] located next the text field for Login name:
- Select the Windows Authentication Radio Button
- Navigate to the User Mapping Page
- Place a check mark next to the AccessControl Database.
- At the "Database role membership for: AccessControl" section, place a check mark next to db_datareader and db_datawriter
- Click [OK]
- Close out of SQL Management Studio
- Restart the LS Application Server service and IIS
Note: IIS can be reset in command prompt by typing IISRESET and hitting enter
- Verify the .NET version is 4.0
- Right-click Computer and select Manage. The Server Manager opens
- In the left pane, select IIS. Servers are shown in the right pane
- Right-click on the proper server name
- Select Internet Information Services (IIS) Manager
- On The Internet Information Services (IIS) Manager window, select Server Name > Sites > Default Web Site
- Make sure that the ASP.NET version is set to 4.0 which it should be by default. To check:
- Double-click .NET Compilation
- Expand Assemblies. Confirm that the system version is 4.0
- Verify IIS Permissions
- From Server Manager click Tools > Internet Information Services (IIS) Manager
- Expand the server > Sites > Default Websites
- Click on Application Pool and verify the LS AppPool .NET setting is 4.0
- If it is not right click on LS AppPool > Basic Settings and change the .NET CLR version to 4.0
- Click on each of the following Connections names from the left pane and double click Authentication. We want to verify each have Anonymous Authentication and Windows Authentication enabled:
- Lnl.OG.Web
- Lnl.OG.Services
- IDVMHost
- AdminApp
- FrontDeskClickOnce
- KioskClickOnce
- Visitor Management Host Configuration
- Navigate to C:\inetpub\wwwroot\Lnl.OG.Services\IdvmWebHost\
- Open and copy all content from the desired protocol’s config file below:
- HttpWithWindowsAuthenticationServices.config
- HttpsWithWindowsAuthenticationServices.config
- Open and copy all content from the desired protocol’s config file below:
- Open Services.Config and paste the previously copied config file replacing all of its contents then save changes
- Navigate to C:\inetpub\wwwroot\Lnl.OG.Services\IdvmWebHost\
- Navigate to C:\Inetpub\wwwroot\lnl.og.services\WebHost and edit the FlexApplicationConfiguration.xml file
- Locate the URL and verify after the Http:// it has the FQDN of the server. The line should look something like: <wsdlUrl>http://tsg-72269b.tsg.lenel.com/Lnl.OG.Services/IdvmService.svc?wsdl</wsdlUrl>
Note: If using SSL change the HTTP to HTTPS - Save if changes were made to the file
- Locate the URL and verify after the Http:// it has the FQDN of the server. The line should look something like: <wsdlUrl>http://tsg-72269b.tsg.lenel.com/Lnl.OG.Services/IdvmService.svc?wsdl</wsdlUrl>
- Navigate to C:\Inetpub\wwwroot\AdminApp and edit the SilverlightApplicationConfiguration.xml file
- Locate the line var g_lnl_pfx_webservice_serverAddress and verify the ServerAddress is the FQDN
Note: If using SSL replace HTTP with HTTPS - Save if changes were made to the file
- Locate the line var g_lnl_pfx_webservice_serverAddress and verify the ServerAddress is the FQDN
- Navigate to C:\Inetpub\wwwroot\lnl.og.web\ and edit the Preferences.js file
- Locate the URL and verify after the Http:// it has the FQDN of the server. The line should look something like: <wsdlUrl>http://tsg-72269b.tsg.lenel.com/Lnl.OG.Services/IdvmService.svc?wsdl</wsdlUrl>
Note: If using SSL change the HTTP to HTTPS - Save if changes were made to the file
- Locate the URL and verify after the Http:// it has the FQDN of the server. The line should look something like: <wsdlUrl>http://tsg-72269b.tsg.lenel.com/Lnl.OG.Services/IdvmService.svc?wsdl</wsdlUrl>
- Client and server browser configuration
- From the Tools menu in Internet Explorer, select Internet Options
- Select the Security tab
- Select the Trusted sites icon and then click [Sites]
- Type the URL for the OnGuard server on which the Web site is hosted
- Click [Add]
Note: You may need to uncheck Require server verification (https:) for all sites in this zone - Click [Close]
- Click [Custom level]
- Locate the following settings in the list and verify that they are set correctly:
- ActiveX controls and plug-ins > Automatic prompting for ActiveX controls – Enabled
- Downloads > File Download – Enabled
- Miscellaneous > Access data sources across domains – Prompt
- Scripting > Active Scripting – Enabled
- User Authentication > Logon – Automatic logon with current username and password
- Locate the following settings in the list and verify that they are set correctly:
- Set the Reset to drop-down menu to Medium-low
- Click [Reset]
- Click [OK]
- A warning dialog may open. Click [Yes]
- On the Advanced tab, select Multimedia > Play animations in web pages
- Click [OK] to close the Internet Options dialog
- Installing the Server Digital Certificate in Internet Explorer if Using SSL (HTTPS)
- In Internet Explorer, open https://<server name>
- Click [Continue to this website (not recommended)] to view the web page
- At the Security Warning, click [Yes]
- In the Address Bar, click [Certificate Error]
- Click [View Certificate]
- Click [Install Certificate] the Certificate Wizard opens
- Click [Next].
- Select Automatically select the certificate store based on the type of certificate
- Click [Next]
- Click [Finish]
- Click [OK]
- Click [OK]
- Testing the IDVM Web Service
- Go to http(s)://ServerFQDN/Lnl.OG.Services/IdvmService.svc
- You should see a page similar to the one on the below:

- If you are on a domain you should see the Fully Qualified Domain Name of the server running IIS on the link after “svcutil.exe”. This is necessary if you will be running IDVM Host.
- If you are on a domain and you don’t see the FQDN for the server, you need to do the following:
- Open IIS, go to the bindings of Default website on port 80. Edit the bindings and add under Host Header Name the FQDN of the IIS server
- Restart IIS
- Go back to http(s)://hostname/Lnl.OG.Services/IdvmService.svc and confirm that now you have the FQDN on the link
- If you still see only the server name, copy crossdomain.xml to wwwroot and restart IIS and LS Application Server
- Click on the link after svcutil.exe, you should see an image similar to:

- IDVM Admin App
- Used only to configure sign-in locations for Visitor Self Service and kiosks
- URL: http://ServerFQDN/adminapp/
- Allows login with either an internal OnGuard account or with directory account that is linked to an OnGuard user
- IDVM Host
- Web based client that allows hosts to create and modify visits without needing System Administration or Visitor Management thick clients
- SSO URL: http://ServerFQDN/idvmhost/
- Non-SSO URL: http://ServerFQDN/idvmhost/?useAutomaticSSO=false
- To use IDVM Host, the host’s directory account needs to be linked to an OnGuard user with the appropriate permissions. Refer to the Visitor Management Host user guide for the necessary permissions.
- The host’s directory account also needs to be linked to their Cardholder profile in System Administration
- The host will need to have the “Allowed Visitors” checkbox checked in the Visits tab of their Cardholder profile
Troubleshooting
- Directories not loading in IDVM Host
- You may need to wait longer for the directories to load. It can take up to a few minutes the first time
- FlexApplicationConfiguration.xml – check line 2 to verify it does not have “LocalHost” instead of the FQDN of the server. If corrected restart LS Application Server and IIS.
- The URL being used must match what is in the FlexApplicationConfiguration.xml exactly
- Verify the settings within System Administration are correct:
- You need to first create a Directory in OnGuard's System Administration
- You need to link a Cardholder to a Directory account in OnGuard
- You need to link a Cardholder to a Directory account in OnGuard
- Under Users | System Permission Groups tab, the permission group for your users must have "User directory accounts" checked
- Error Message "You are being logged out because you do not have permission to host visits. Please see your administrator."
- Verify the “Allowed Visitors” checkbox in System Administration > Cardholders > Visits is checked
Note: This box can only be checked for Cardholders. If the person type is Visitor it cannot be checked
- Verify the “Allowed Visitors” checkbox in System Administration > Cardholders > Visits is checked
- Emails are not being sent when I create a visit in IDVM Host
- Verify the Global Output Service is configured and try sending a test email of an event from Alarm Monitoring. If the email was not received refer to KB 1533 for additional Global Output troubleshooting.
- In System Administration navigate to Administration > Cardholder Options > Visits and verify “Include host’s email by default” and “Include visitor’s email by default” are both checked. These settings are not turned on by default.
- Verify an email field is present on the Visitor form. On the Cardholder form click Search and change the Person Type drop down to Visitors then click OK. In some cases the email field will be missing however it can be added to the form but it will require the full version of FormsDesigner.
- Create a database backup
- Log into FormsDesigner and select the Visitor form
- Navigate to Insert > Text Field and create a box on the form
- Match the settings to the provided screenshot

- Insert a label for the new text field. Give it an object name of Visitor Email Label. In the Assigned field drop down list select Visitor Email (or whatever name was given to the text field in the above step.)
- Click on Save then select Save and PRESERVE any existing user defined cardholder data (Slowest)
- Once the save completes restart the LS Application Server service
- Create a new visit from IDVM Host and test that email was received
- LS Application server starts then stops
- FormsTranslator must be run prior to using the web applications
- Navigate to the root of the OnGuard installation and run Lnl.Tools.FormTranslator.exe
- Error Message “Could not sign out visit event. The badge status for sign out must be configured.”
- In System Administration navigate to Administration > Cardholder Options > Visits
- Click Modify then select the desired value for “Badge status for sign out”
- Click OK
- Is there an Auto Log off option with our web apps?
- No, there is no way to set a logoff time for our web applications
- No, there is no way to set a logoff time for our web applications
- Error about Javascript needing to be enabled for this page to display
- From Internet Explorer navigate to Tools > Internet Options > Security > Trusted Sites > Custom Level
- Find the option under Scripting “Scripting of Java Applets” and enabled it
- Click OK twice to close out of Internet Options
- SOAP Errors
- SOAP errors typically point to issues with permissions. Verify the following areas were correctly configured as per this document:
- Create a domain admin account for the LS Application Server
- The user running the LS Application Server service has full Permission to wwwroot and all of its subfolders
- Add the SQL login for the user
- Start the LS Application Server service using the above domain admin account
- IIS was correctly configured prior to installing OnGuard
-
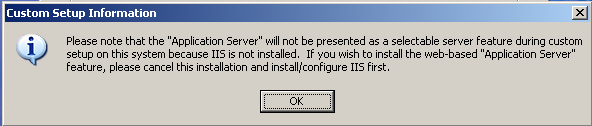
If IIS was not installed the following error will show - If IIS was not installed prior to the LS Application Server, you will need to either uninstall and reinstall OnGuard
-
- SOAP errors typically point to issues with permissions. Verify the following areas were correctly configured as per this document:
- HTTP 401 or HTTP 404 Not Found when browsing to http://hostname/Lnl.OG.Services/IdvmService.svc
- You may get this error, even though the file DOES exist and you can even browse to this file by going to http://<hostname>/Lnl.OG.Services/.
- Verify that .NET Framework 3.5 is enabled, expand it out and also enabled HTTP Activation
- Verify .NET Framework 4.5 is enabled, expand it out, verify that WCF Services are enabled, expand it out and enable HTTP Activation

Applies To
OnGuard up to 8.0
© 2024 Honeywell International Inc. All Rights Reserved.