RabbitMQ and NGINX uninstall and installation
This document serves as a guide for customers who want to upgrade these third-party components.
Note: Specific versions of each component are not specified below. The Third-party Application Compatibility chart located at https://connect.lenels2.com/s/downloads includes the specific version that the solution supports. The version listed ensures that testing was completed, and that the component version is compatible with OnGuard.
Note: LenelS2 strongly recommends that customers or VARs call the LenelS2 Technical Support Group before implementing these steps. It is important to discuss the reasons for wanting to apply patches or fixes to these third-party software plug-ins, and to receive guidance and expertise from the LenelS2 Technical Support Group if an issue is encountered during this process.
Process
Prerequisites:
- Erlang OTP package
- RabbitMQ Server package
- NGINX package
Located in the OnGuard ISO image:
OnGuard versions 7.5, 7.6, 8.0, 8.1
- ~\Windows\Temp\RabbitMQ
Starting with OnGuard version 8.2
- ~:\CommonAppData\Lnl\Temp\RabbitMQ
- ~:\program files\OnGuard
Uninstall Process for RabbitMQ and Erlang
Note: The uninstall process should be followed completely before reinstalling or upgrading to a later version.
- Stop the following services by navigating to Run > Services.msc:
- LS Message Broker
- LS Web Service
- Uninstall the current version of RabbitMQ under Programs and Features:

- Uninstall the current version of Erlang OTP under Programs and Features:

- Open a command prompt as an administrator:

- In the command prompt window, type the following command and press Enter:
tasklist |findstr "epmd" - The output of the command will list the details for the process named epmd that needs to be stopped. Make a note of the process ID value that is listed just before the word 'Services', which in the example below is 4032:

-
To stop the epmd process, run the following command using the process ID that was obtained from the previous step. In this example, the process ID value of 4032 was used:
taskkill /f /pid 4032 -
The output of the command should show that it was completed successfully and that the epmd process was terminated:

- Manually delete the following application file directories:
- C:\Program Files\RabbitMQ Server
- C:\Program Files\Erlang OTP
- Manually delete the Windows AppData files for RabbitMQ:
- C:\Users\<Windows user account that installed RabbitMQ>\AppData\Roaming\RabbitMQ
- C:\Users\<Windows user account that installed RabbitMQ>\.erlang.cookie
- C:\Windows\System32\config\systemprofile\.erlang.cookie
- Manually delete the Windows Registry keys by navigating to Run > regedit.exe:
- Delete the Folder: HKEY_LOCAL_MACHINE\SOFTWARE\WOW6432Node\Ericsson
- Delete the Folder: HKEY_LOCAL_MACHINE\SOFTWARE\Ericsson
- Delete the Folder: Computer\HKEY_LOCAL_MACHINE\SYSTEM\ControlSet001\Services\RabbitMQ
- Reboot Windows.


Installation Process for RabbitMQ and Erlang
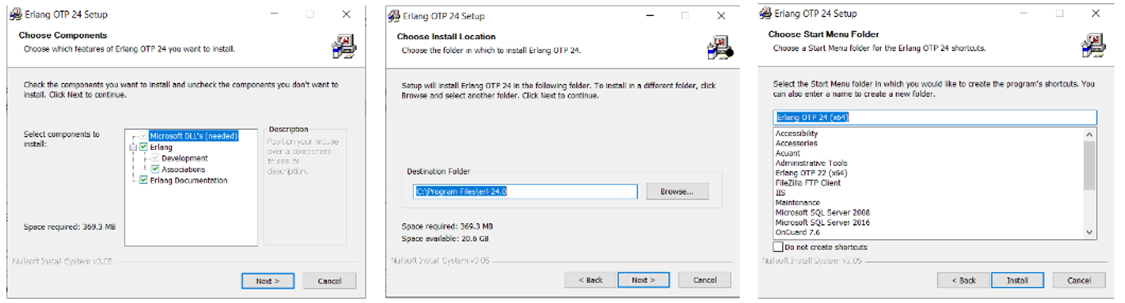
- Install Erlang:
Notes:
- RabbitMQ requires a 64-bit supported version of Erlang for Windows to be installed
- Installer can be located in the OnGuard ISO or downloaded from:
https://www.erlang.org/downloads
- Download OTP xx.x Windows 64-bit Binary File version.
- Complete the installation by running the executable:
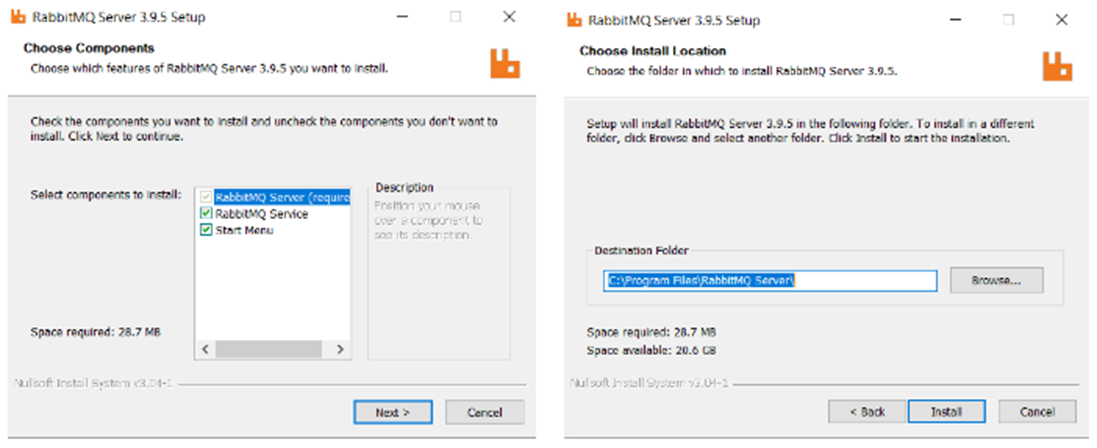
- Install RabbitMQ. Compatible version can be found in the OnGuard ISO or downloaded from: https://www.rabbitmq.com/install-windows.html.
- Complete the installation by running the executable:
- Reboot the Server or restart OnGuard services.
- Run OnGuard Setup Assistant.
- Launch an OnGuard application to confirm successful login.


Additional steps needed for RabbitMQ (not necessary for all systems)
- Run the following in the RabbitMQ command line prompt one at a time
- rabbitmq-service remove
- rabbitmq-service install
- rabbitmq-service start
- rabbitmqctl start_app
- rabbitmqctl status
- Confirm that the node has started.
- Run OnGuard Setup Assistant.
Update the LenelRabbit User for Message Broker
Run as one command line:
rabbitmqctl.bat add_user LenelRabbit LenelS2Secur1ty# & rabbitmqctl.bat set_user_tags LenelRabbit administrator & rabbitmqctl.bat set_permissions -p / LenelRabbit ".*" ".*" ".*" & rabbitmqctl.bat add_vhost LenelHost & rabbitmqctl.bat clear_permissions -p LenelHost guest & rabbitmqctl.bat set_permissions -p LenelHost LenelRabbit ".*" ".*" ".*" & rabbitmqctl.bat set_user_tags guest none & rabbitmqctl.bat clear_permissions -p / guest & rabbitmqctl.bat change_password guest gDGcutUASH7WV & rabbitmq-plugins enable rabbitmq_management
Update the LenelRabbitLD User for the Login Driver
An additional command line for versions 8.1 and later is required to update the Login Driver. Run as one command line:
rabbitmqctl.bat add_user LenelRabbitLD LenelS2Secur1ty# & rabbitmqctl.bat set_user_tags LenelRabbitLD administrator & rabbitmqctl.bat set_permissions -p / LenelRabbitLD ".*" ".*" ".*" & rabbitmqctl.bat add_vhost LenelHostLD & rabbitmqctl.bat clear_permissions -p LenelHostLD guest & rabbitmqctl.bat set_permissions -p LenelHostLD LenelRabbitLD ".*" ".*" ".*"
Applies To
OnGuard 7.5 and later
Additional Information
Upgrading NGINX if needed
- Navigate to C:\Program Files (x86)\OnGuard\nginx and rename the existing executable file from nginx.exe to nginx.exe.old.
- Navigate to nginx.org and download the required mainline version:

- Copy the new nginx executable from the zip file to same file path C:\Program Files (x86)\OnGuard\nginx:

- Open a command prompt and verify the executable displays the correct version using the following command:
C:\Program Files (x86)\OnGuard\nginx Nginx -v - Restart all OnGuard services or reboot the server.


© 2024 Honeywell International Inc. All Rights Reserved.